 Summer is here - time to bask in the glorious sun! I recently made a trip out to the beach and found many a treasure in the sand. But what to do with it? The answer: recreate your day in the sun using the beach itself! Now you never have to leave home to enjoy the seashore.
 Materials:
- Jar or bottle
- Sand
- Shells
- Popsicle stick
- Marker
- White glue
 Step 1: Combing the Beach
On your next trip out to the beach, take a moment to scan the sand. Chances are there are cool shells and other such treasures all around you. I found this really awesome crab shell, sand dollar, and a couple of other shells that tickled my fancy. Resist the urge to take all of these neat finds, as the bottle only has so much room in it for decorating!
Next, you need to collect some sand. I actually used some colored sand that I had, but it would also be a really good idea to take some of the sand from the beach you are recreating on a miniature scale. The choice is yours!
 Step 2: Creating A Mini Scene
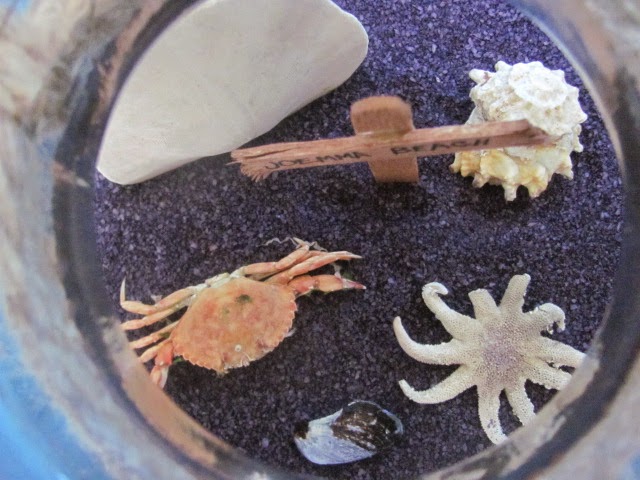
Now that you have collected all of your treasures, fill up your bottle or jar with sand until it looks just right to you. Once the sand is in, you can cut the popsicle stick into two pieces. One piece should be longer to act as the sign post, and the other shorter for the actual sign. Write the name of your beach on the shorter piece and then glue it to the longer popsicle stick piece.
While this is drying, begin arranging your shells in your bottle. While deciding what went into the bottle, I realized that sometimes less is more (I warned you to resist the urge to collect all shells in sight!!). Once your arrangement is complete - I took a loooooong time to decide what went where - you can stick your beach sign into the sand. Make sure there is enough sand to hold up the popsicle stick sign, or it might fall over.
 Ta daaaaaa! Your custom beach in a bottle is complete. Now all that's left is to find the perfect place for it and enjoy the view.


